Homemade Cocoa, Coconut and Peanut Butter Nakd Bars

Dear Reader,

I discovered a new lovely treat! Find it below:

  • ½ cup dried dates
  • ½ cup almond meal (or almonds)
  • 3 Tbsp sultanas
  • 2 Tbsp cocoa powder
  • 1-2 tsp boiling water
  • Peanut butter (small amount)
  • 2 tsp desiccated coconut unsweetened

Method

  1. Combine dry ingredients into a food processor and pulse until a fine consistency and no lumps of dried fruit remain
  2. Add ½ a tsp of boiling water at a time and blitz together
  3. Shape into balls/bars as desired and with each serving add a small amount of peanut butter that acts as a binding agent
  4. Wrap in cling film
  5. Store in an airtight container in the fridge

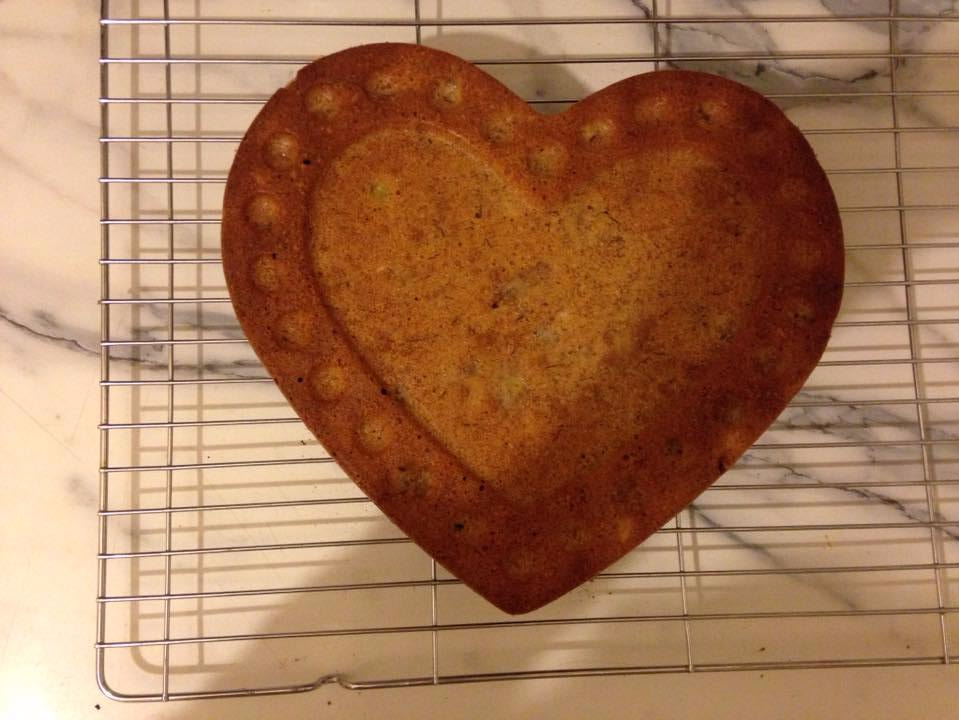
Healthy GF Chocolate Brownies

Dear Reader,

So yesterday I stumbled across this recipe from Jamie Oliver for vegan brownies and they looked so yummy! I changed the recipe quite a lot (making it GF and substituting other ingredients) as an experiment and it tasted beautiful!

Here is the link to Jamie’s recipe: https://www.jamieoliver.com/recipes/chocolate-recipes/vegan-chocolate-brownies/

But read below for my modified version:

Ingredients:

5 tbsp Olive Oil

200g Dark Chocolate (I recommend chocolate with 70% cocoa mass)

170g GF Self Raising Flour

3 heaped tsp Cocoa (100% cocoa mass)

180g Coconut Sugar

Pinch of Salt

1 tbsp Vanilla Essence

230ml Milk


Method:

  1. Preheat the oven 180 degrees Celsius and grease or line a square baking tin (20cm approx.)
  2. Melt 150g of the chocolate and set aside to cool.
  3. In the meantime, sieve the flour and cocoa in a mixing bowl.
  4. Stir in the sugar and salt.
  5. Add the vanilla essence, oil, milk, and melted chocolate and mix together.
  6. Roughly chop the remaining chocolate and add to the mixture.
  7. Pour the mixture into the tin and spread evenly.
  8. Bake for 20 minutes or until the outside of the brownies are cooked and the middle is gooey.
  9. Take the brownies out and put onto a wiring rack to cool.
  10. Cut and enjoy!


There you have it! Even though mine turned out a bit cracked (due to not letting them cool enough before taking them out of the tin) they were still delicious! I hope you have more patience than me and allow yours to cool!

40374943_375047829698038_2383240845328384000_n

Please let me know if you like my GF healthy brownie recipe, you can comment below or email me on ericamulkern1414@gmail.com

Cover image source: http://www.justcooking.ie/images/classes/25.jpg


Small Achievement and Smoothie Recipe!

Dear Reader,
Hello! It has been a while since my last blog post, but now that I am settled back in England and my MA is behind me, I have a lot more time on my hands!
Recently I have been attending yoga lessons at Yoga Dave in Rokt Brighouse: http://yogadave.uk/
Dave teaches Ashtanga yoga which is the form of yoga I most enjoy. I find Dave’s classes calming and challenging.

A small personal achievement: Even though I am very flexible I struggle to ‘fold over’ flat when in these positions:

stock-photo-yoga-runner-girl-stretching-back-over-legs-doing-seated-forward-bend-fold-named-paschimottanasana-700229395 (1)

stock-photo-young-women-stretching-their-leg-muscles-touching-their-knees-with-noses-257889899 (2)

I can go flat to my leg when I have only one of them out and the other leg is tucked in, but not with both outstretched in front of me. This is something that has frustrated me hugely throughout my life as a dancer and to try and get this flat fold I would distort my back, hunch over, grab my feet as hard as possible, ANYTHING to get flat…
In my yoga class yesterday we were in the position demonstrated in image 1 for around 3 minutes; we did a variety of footholds with breathing exercises. Instead of focusing on getting flat I focused on the breath (for once)!
Guess what happened… my forehead knocked against my knees, I WAS FLAT! Obviously my body dipped in and out of this position due to it not being used to it and I didn’t push, I just focused on breathing and relaxing and enjoying the moments when I felt my forehead knock against my knees just as much as the pleasure of feeling my back stretch.
Moral of the story: it’s time to stop focusing on the ‘position’ and ‘perfection’, I feel much better and calmer when I focus on the breath.

I just wanted to share this little achievement and I would be very interested to hear your personal small achievements in your life (don’t need to be sport related)!
I made a weird but yummy smoothie yesterday and since my cake recipe went down so well (which I will link at the end) I thought it would be good to branch out and try some healthy and weird smoothies. Let me know your thoughts, this won’t be to everyone’s tastes but give it a go!
Ingredients:
Handful of blueberries
Stick of celery
1 pink lady apple
Chunk of fresh ginger
Apple juice (fill your container generously so that the smoothie won’t be too thick)
Tablespoon of honey

Method:
1) Prepare all fruit and veg by washing, chopping, peeling etc
2) Put all ingredients in your blender/smoothie machine
3) BLEND
4) Enjoy!

Thank you all for reading, you can always email me on ericamulkern1414@gmail.com if you have any questions or comments and let me know if you tried the smoothie!

Link to my cake recipe:

https://ericamulkern.wordpress.com/2017/12/12/healthy-gf-df-dark-chocolate-orange-loaf/

Healthy GF, DF Dark Chocolate Orange Loaf!

Dear Reader,
Today I have decided to share with you my own recipe for a healthy, gluten and dairy free dark chocolate loaf!

This is a very rich dessert especially as I use 98% cocoa, so if you want it to be a bit sweeter I suggest using a lesser percentage of cocoa powder and adding a little bit more coconut sugar.

Ingredients:

  • 1/3 cup of coconut oil
  • ½ cup of coconut sugar
  • 2 eggs
  • 1 cup of mashed bananas
  • 1/3 cup of coconut milk (or almond or soya)
  • ½ cup of dark cocoa (I use Green&Blacks 98% cocoa)
  • 1 tsp baking powder
  • 1 tsp vanilla extract
  • Orange juice of 1 and ½ oranges
  • 1 ¾ cup of gluten free plain flour
  • Zest of 1 orange

DSC_0002.JPG

Utensils needed:

  • Large plastic bowl
  • Tablespoon and tea spoon measurers
  • Loaf tin (small/medium size)
  • Cup measurers
  • Whisk
  • Non-stick baking paper
  • Wooden spoon
  • Fine grater/zester

pic 2

Instructions:

  1. Preheat oven to 160 degrees celcius.

2.  Melt coconut oil and then pour into bowl, add coconut sugar and whisk together.

pic 3arrow.jpgpic 4

  1. Whisk in eggs, bananas and milk.


pic 5arrow.jpgpic 6.jpg


  1. Add in cocoa, baking powder, vanilla extract and orange juice and whisk.
  2. Switch to the wooden spoon and stir in the flour and orange zest.
  3. Line loaf tin with non-stick baking paper and pour the mixture in.

pic 8

  1. Bake for 40-45 minutes. Check if it is done by sticking a fork or wooden cocktail stick and if it comes out dry and clean then it is done (if a few crumbs are on the fork or stick that’s fine as long as they are dry the cake is done)
  2. Transfer the cake onto a wire rack to allow it to cool completely and TA-DAH! You have a glorious healthy chocolate loaf!

This slideshow requires JavaScript.

You don’t have to use gluten free flour or alternative milks if you don’t wish to, I wanted to make the recipe gluten and dairy free so that more people can enjoy it! This is a healthy cake as coconut sugar is the same as honey- in moderation it is healthier than normal sugar but don’t go overboard! I hope you enjoy this recipe and please feel free to comment on this post or email me any questions or pictures on ericamulkern1414@gmail.com


Super Healthy Gluten Free Banana Bread!

Dear Reader,

I love to bake, but I do not like baking when it includes heaps of sugar, butter and other things that aren’t that good for us! So I have been perfecting a recipe that is very healthy and also gluten free; I looked at lots of other recipes so I guess mine is a big jumble of all of them with my own twists and ideas, I hope you enjoy!

INGREDIENTS
  • ⅓ cup melted coconut oil
  • ½ cup honey
  • 2 eggs
  • 2 large bananas
  • ¼ cup milk (can also use soya/almond milk)
  • 1 teaspoon baking soda
  • 1 teaspoon vanilla extract
  • ½ teaspoon salt
  • ½ teaspoon ground cinnamon, plus more to add on top of the banana bread
  • 1¾ cups gluten free self raising flour (you can also use white whole wheat flour if you are not gluten free)
INSTRUCTIONS
  1. Preheat oven to 165 degrees Celsius and add baking paper to a 9×5-inch loaf tin (or whatever size loaf you have)!
  2. In a big bowl, beat the oil and honey together with a whisk. Add the eggs and beat well, mash the bananas and then whisk in the bananas and milk.
  3. Add the baking soda, vanilla, salt and cinnamon, and whisk to blend. Finally, swap to a big wooden spoon and stir in the flour, until just combined- we don’t want to over mix!
  4. Pour the batter into the loaf tin and sprinkle lightly with the extra cinnamon.
  5. Bake for 55 to 60 minutes, or until a toothpick inserted into the centre comes out clean.
  6. Let the bread cool in the loaf tin for 10 minutes, then transfer to a wire rack to cool for 20 minutes before slicing.

So there we go! Super healthy gluten free banana bread (and potentially dairy free if you wish!) This recipe works in a loaf tin as well as a cake tin- as you can see in the pictures. Happy baking x

This slideshow requires JavaScript.


Healthy banana and oat cookies!

Dear Reader,

Here’s a link to the recipe and I’ve typed it out in case you want to quick scan: (I have also slightly changed the recipe for a different taste, try out both versions and let me know which you like best!)

http://www.food.com/recipe/ridiculously-healthy-banana-oatmeal-cookies-206246

Ingredients:

  • 3 ripe bananas
  • 2 cups oats (not instant, the proper scotts type)
  • 12cup whole milk
  • 1 egg
  • 2 tablespoons honey
  • 12teaspoon vanilla extract
  • 1 tablespoon low-fat peanut butter (optional)

Directions:

  1. Preheat the oven to 180c.
  2. Mash the bananas and mix with the oats, milk and egg before adding the remaining ingredients (it just mixes a bit easier and more evenly this way). These measurements make the mixture just the right consistency for my liking, but if it looks a bit runny to you at this point, throw in another handful of oats to thicken it up.
  3. Grease a cookie tray with 1 cal spray and spoon the mixture on to make around 9 large cookies.
  4. Bake for around 20mins until golden brown.

Makes 9 cookies.

Jamie Oliver’s Sweet Potato Muffins

Dear Reader,

I am always on the lookout for healthy snacks to help fuel my long days of dancing and I found this recipe by Jamie Oliver. I made them today, they are super easy to make and delicious! Here is a link to the recipe but I have copied it out in case you want to quick scan:

http://www.jamieoliver.com/recipes/vegetables-recipes/sweet-potato-muffins/

Ingredients

  • olive oil
  • 600 g sweet potatoes or ½ a butternut squash
  • 4 spring onions
  • 1-2 fresh red chillies
  • 6 large free-range eggs
  • 3 tablespoons cottage cheese
  • 250 g wholemeal self-raising flour
  • 50 g Parmesan cheese
  • 1 tablespoon sunflower seeds
  • 1 tablespoon poppy seeds

Method

Preheat the oven to 180°C/350°F/gas 4. Line a 12-hole muffin tin with paper cases or 15cm folded squares of greaseproof paper, then lightly wipe each one with oiled kitchen paper. Peel the sweet potatoes or squash and coarsely grate into a large bowl. Trim the spring onions, then finely slice with the chilli and add to the bowl, reserving half the chilli to one side. Crack in the eggs, add the cottage cheese and flour, then finely grate in most of the Parmesan and season with sea salt and black pepper. Mix until nicely combined.

Evenly divide the muffin mixture between the cases. Sprinkle over the sunflower and poppy seeds, then dot over the reserved slices of chilli. Use the remaining Parmesan to give a light dusting of cheese over each one, then bake at the bottom of the oven for 45 to 50 minutes (if using squash, it’ll be a bit quicker – check after 35 minutes), or until golden and set.

These are amazing served warm 5 minutes after taking them out of the oven, and good kept in the fridge for a couple of days. Enjoy 2 muffins per portion.

Healthy Jam

Dear Reader,

I found a recipe for jam that does not contain heaps of sugar (like all shop bought jam does) and it is very easy and cheap to make. I found it on: http://www.thekitchn.com/how-to-make-easy-chia-jam-with-any-fruit-222310

I have written the recipe out for you to quick scan, there is a lot of information about chia seeds in the website link so I do recommend reading it as well.

How To Make Easy Chia Jam

Makes 1 1/2 to 2 cups

What You Need

Ingredients
2 cups chopped fruit
1 to 2 tablespoons lemon juice, to taste
1 to 2 tablespoons honey, agave, maple syrup, or sugar, to taste
2 tablespoons chia seeds, plus more if needed

Equipment
Measuring cups and spoons
Spatula
Saucepan
Potato masher, optional
Glass jars or other storage containers, for the finished jam

Instructions

  1. Prepare the fruit as needed: Remove stems, pits, seeds, and skin, as needed. Chop large fruits into small pieces. Berries can be left whole.
  2. Cook the fruit until it starts to break down: Transfer the fruit to a saucepan and set over medium heat. Cook until the fruit breaks down and becomes syrupy, 5 to 10 minutes. Mash the fruit with the back of a spatula or a potato masher, leaving it as smooth or as lumpy as you like.
  3. Stir in the honey and lemon juice: Off the heat, stir in 1 tablespoon of the honey and lemon juice. Taste and add more honey or lemon juice to taste.
  4. Stir in the chia seeds.
  5. Let stand 5 minutes, until thickened: This won’t quite reach the firm consistency of regular jam, but it will noticeably thicken. If you’d like a thicker consistency, especially with very juicy fruits, stir in more chia seeds 1 teaspoon at a time.
  6. Transfer to a jar or other storage container: Once the jam has cooled to room temperature, transfer it to a jar or other storage container. Store in the fridge for about 2 weeks. The jam will thicken further and become more set once completely chilled. The jam can also be frozen for up to 3 months; thaw in the fridge before using.

Recipe Notes

  • No-cook chia jam: Mash the fruit with a fork until pulpy and juicy, then stir in the rest of the ingredients. You can also combine all the ingredients in a blender, or use an immersion blender, and blend until the jam is completely smooth. Uncooked chia jam tends to be a bit looser and more sauce-like than the stovetop version; add extra chia seeds if you’d like a thicker consistency.
  • Getting rid of visible chia seeds: If you’d prefer not to have visible chia seeds in your finished jam, puree the jam in a blender or with an immersion blender. If you’d like to keep a somewhat chunky texture, blend just a portion of the jam with the chia seeds, then stir it back in with the rest of the jam.

Image: http://ohmyveggies.com/wp-content/uploads/2014/05/how-to-make-chia-seed-jam-7.jpg

Mary Berry’s Holiday Banana Cake

Dear Reader,

It feels like forever since I last blogged! But I found a gorgeous recipe by none other than the Queen of baking; Mary Berry! I’ve just made this for my housemates using gluten free flour and coconut oil instead of sunflower oil! Taken from her book ‘Foolproof Cooking’

INGREDIENTS:

125ml sunflower oil

200g caster sugar

1 tsp vanilla extract

175g plain flour

1 tsp bicarbonate of soda

Half tsp ground cinnamon

2 eggs beaten

3 small ripe bananas, peeled and mashed

METHOD:

  1. You will need a 900g loaf tin. Preheat the oven to 180 degrees, then grease the tin with oil and line the base with a strip of baking paper.
  2. Place all the ingredients in a large bowl and whisk together for 1 minute. Spoon into the prepared tin and level the top.
  3. Bake in the oven for about an hour until lightly golden brown on top, springy to the touch and coming away from the sides of the tin.
  4. Cool in the tin for 10 minutes, then remove and leave to cool on a wire rack. Cut into slices and serve plain or with butter.

Image source:        http://i1.coventrytelegraph.net/incoming/article8729097.ece/ALTERNATES/s615b/banana-bread5.jpg

Jamie Oliver’s Smoothie Pancakes

Dear Reader,

On Saturday morning I made this recipe by Jamie Oliver and I thought that I needed to share it with you all! I could not find a website link so I have typed it out and the book it is from is called ‘Everyday Superfood’

They are yummy and make breakfast even more interesting!

Ingredients:

320g blueberries or raspberries

1 ripe banana

170ml semi-skimmed milk

1 large egg

250g wholemeal self-raising flour

4 tablespoons natural yoghurt

ground cinnamon

30g mixed unsalted chopped nuts, such as walnuts, pecans and hazelnuts

manuka honey

Method:

Blitz half the berries, the peeled banana, milk, egg and flour in a blender to make a smoothie pancake batter. Tip into a bowl and fold in the remaining berries. Place a large non-stick frying pan on a medium-high heat. Once hot, put your batter into the pan to make large pancakes or little ones, whichever you fancy. Either way cook for a couple of minutes on each side, or until crisp or golden. Sometimes I flip them for an additional 30 seconds on each brown side to ensure they get super-crispy. Serve as and when they’re ready, while you get on with more.

To serve, I like to slice my pancakes in half so you can see all that lovely fruit. Top with a dollop of yoghurt, a sprinkling of cinnamon and scattering of toasted nuts, then finish with a little drizzle of honey.

Side note: once you’ve made the pancake batter, you can cook it right away or pop it into the fridge to keep for up to 3 days, to use each morning. Takes 20 minutes to cook.

Nutritional facts:

357kcal

10g fat

2.2g sat fat

13.3g protein

54.9g carbs

17g sugar

8.9g fibre